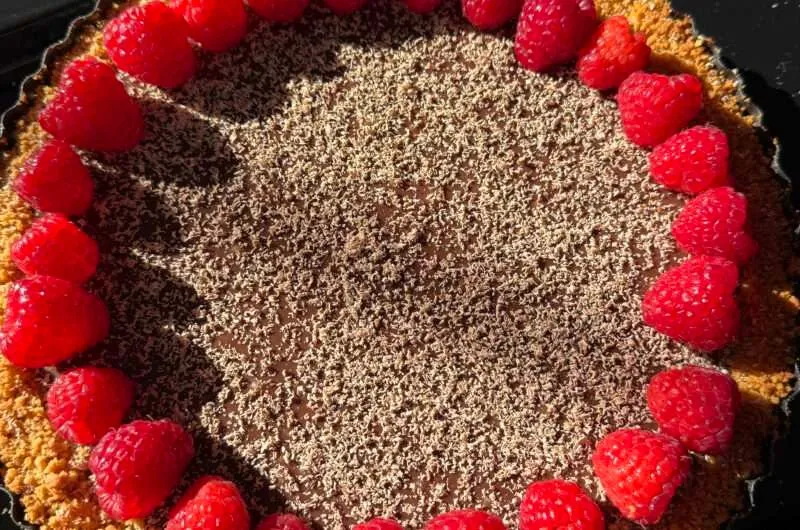
Chocolate Ganache Tart
Mother’s Day is a big deal in our family, and everyone gets involved. This year, all my brothers are cooking something for Mum, and I called shotgun on dessert. I wanted to make something that felt special but didn’t require a pastry degree or a hundred ingredients. This Chocolate Ganache Tart is rich, silky, and deeply chocolatey, but best of all, it’s incredibly easy. If you’ve got a food processor and a saucepan, you’re pretty much there.
Serves
8
Prep time
15 minutes
Cooking time
180 minutes
Helpful Tips

Storage
Store the tart in the fridge, covered, for up to 4 days.
.svg)
Substitutions

Serving Suggestions
Helpful Tips
Storage
Store the tart in the fridge, covered, for up to 4 days.
Substitutions
Serving Suggestions
Ingredients
- 250g plain sweet biscuits (e.g. Arnott’s Marie)
- 150g unsalted butter, melted
- 500g milk chocolate, finely chopped
- 300ml thickened cream
- 1 tsp vanilla extract
- Fresh raspberries
Tips for the best Chocolate Ganache Tart
- Use a loose-based tart tin for easy removal and a clean finish. If you only have a standard tart or pie tin, line both the base and sides with baking paper to help lift the tart out once baked.
- Place the tart tin on a baking tray before filling and baking, this makes it easier to move and catches any spills or leaks.
- Cool before removing: Let the tart cool in the tin in the fridge for at least 2.5 hours. This helps it firm up, making it easier to remove without cracking or breaking.
- For a biscuit base that holds together beautifully, aim for a texture like wet sand. It should feel slightly moist and clump easily when pressed between your fingers. If it’s too dry, the base will crumble after chilling and won’t slice cleanly—just add a little more melted butter to bring it together.
- Grease lightly: A light layer of butter or spray oil is enough. Over-greasing can cause the base to brown too quickly or become greasy.
- For the cleanest slices, run a knife under hot water and wipe dry before cutting.
Directions
- Preheat the oven to 180°C (160°C fan-forced).
- Lightly grease a 25cm loose-based tart tin and line the base with baking paper.
- Blitz the biscuits into fine crumbs using a food processor.
- Transfer to a bowl, add the melted butter, and mix until the texture resembles wet sand with no dry patches. If the mixture feels too dry, add more melted butter (just enough so it clumps when pressed between your fingers and holds its shape). The mixture should be slightly moist but not greasy!
- Tip the mixture into the tart tin and press it firmly into the base and sides using the back of a spoon or a flat-bottomed cup.
- Bake for 10 minutes, then remove from the oven and allow to cool slightly.
- Place the chopped milk chocolate in a heatproof bowl.
- Heat the cream in a saucepan over medium heat until it just begins to simmer, then pour it over the chocolate.
- Let it sit for 1–2 minutes before stirring gently until smooth and glossy. Stir in the vanilla.
- Pour the ganache into the cooled tart base and gently tap the tin to level the surface.
- Refrigerate for at least 2.5 hours, or until fully set.
- Decorate with raspberries around the perimeter and finish with chocolate shavings.
- Slice with a warm knife for clean edges.
Watch How to Make It
See More Desserts


Join for Exclusive Resources
Meal plans
Premium recipes
Weekly email from me
Oops! Something went wrong while submitting the form.

Dessert
Date night